

Table of Contents
- How to Blend Hair With Clipper Guards: The Foundation
- Clipper Guard Sizes for Fades: Choosing Your Starting Point
- How to Use Clipper Guards Correctly: Setting and Removing
- Clipper Lever Positions for Blending: Open and Closed Technique
- How to Blend a Line in a Haircut: Step-by-Step Blending Process
- Common Mistakes to Avoid When Blending
- Hair Type, Texture, and Growth Pattern Adjustments
- Diagnosing and Fixing Blend Lines
- Professional Tools Make a Difference
- Next Steps: Building Your Blending Skill
- Frequently Asked Questions
Last Updated: October 6, 2026
How to Blend Hair With Clipper Guards: The Foundation
Learning how to blend hair with clipper guards separates a sharp fade from an obvious, harsh line.
The key is understanding how guards work together. Each guard number creates a specific length, and moving between them smoothly requires technique, the right lever position, and knowing when to switch tools.
This guide covers guard selection, lever control, and the hand movements that create clean transitions, giving you a repeatable system for any hair type.
What You'll Need Before You Start
Gather your tools before you start so you don't interrupt your flow mid-cut.
You'll need:
- Clippers with adjustable guards, most professional clippers accept standard guards
- Guard set, typically numbered 0.5 through 4 or higher
- Clipper lever, built into most clippers; controls blade depth
- Fade comb, helps with clipper-over-comb work and visibility
- Trimmer or detail blade, for cleanup and outlining (optional but helpful)
- Blade oil, keeps blades cool and sharp during extended use
The Percu Fade Comb #PC-046 is designed for this work. At just $2.79, its finely spaced teeth give you the control and visibility to see exactly where your clipper is cutting.

Keep your guards organized with the Fade Supply Guard Vault, 10 Slot, which keeps ten guards upright and ready.
Clipper Guard Sizes for Fades: Choosing Your Starting Point
Guard numbers tell you the length you're cutting: lower numbers mean shorter hair. Understanding the progression helps you plan your fade before you start.
Understanding Guard Numbers and Lengths
Guard numbers correspond to specific lengths. A number 1 cuts shorter than a number 2; a 0.5 cuts even shorter.
Most fades start with a lower guard at the nape and sides, then move to higher guards as you work upward, creating the gradient.
Common starting points:
- Number 0.5 or 1, for tight, skin-tight fades
- Number 1.5 or 2, for moderate fades with visible length
- Number 2 or 3, for longer fades that blend into the top
Hair type matters too. Thick, coarse hair handles lower numbers without looking patchy; fine or thin hair often looks better starting one guard size higher.
Guard Transitions: Moving Between Adjacent Guards
The magic of blending happens in the transition between guards. Don't jump from a 1 to a 3; move through adjacent sizes: 1 to 1.5 to 2 to 2.5. Small increments create smooth blends; skipping sizes creates visible lines.
Here's how guard progression works:
| Starting Guard | Next Guard | Then | Finally |
|---|---|---|---|
| 0.5 | 1 | 1.5 | 2 |
| 1 | 1.5 | 2 | 2.5 |
| 1.5 | 2 | 2.5 | 3 |
| 2 | 2.5 | 3 | 3.5 |
The higher you go, the more hair remains. At the top, you might remove the guard entirely or switch to scissors for the final blend into the longer hair.
How to Use Clipper Guards Correctly: Setting and Removing
Getting the guard on and off properly matters. A loose guard shifts during cutting. A guard seated wrong creates an uneven line.
Attaching Guards and Setting Guidelines
Slide the guard onto the clipper blade until it seats fully; you should hear or feel a click. Some guards have a locking mechanism, so make sure it engages.
Once attached, the guard sets your cutting length: the blade only cuts hair extending past the guard, leaving anything underneath untouched.
Set your guideline before you start cutting. Start at the nape or sideburn and make one clean, deliberate pass upward.
Removing Guards for Detailed Work
Removing the guard exposes the blade fully, giving you maximum cutting depth for cleanup, outlining, or blending into very short hair.
To remove a guard:
- Locate the release button or latch (usually on the side of the clipper)
- Press or slide it while gently pulling the guard away
Some barbers remove the guard to blend the bottom of the fade into the skin, or for detail work around the ears or neckline. Without a guard you have complete control but zero margin for error.
Clipper Lever Positions for Blending: Open and Closed Technique
The clipper lever is a powerful tool for blending, adjusting how deep the blade cuts relative to the guard.
Lever Closed: Creating Definition
With the lever closed, the blade sits flush with the guard, giving you the full cutting depth the guard allows and a clean, defined line.
Use the lever closed when:
- You're establishing your guideline
- You want a sharp transition between guards
- You're cutting through thick or coarse hair
Closed lever = maximum blade depth = defined lines.
Lever Open: Softening the Blend
Opening the lever pulls the blade back slightly so it no longer cuts as deep, leaving behind hair that would be cut with the lever closed and creating a softer, less defined line.
Use the lever open when:
- You're blending between guards
- You want to soften the transition
- You're working on fine or thin hair
Open lever = reduced blade depth = softer blend.
Many barbers blend by switching guards; barbers can also blend with the lever. Stay on the same guard, open the lever, and create a gradual transition.
How to Blend a Line in a Haircut: Step-by-Step Blending Process
Follow these steps in order to create a smooth blend every time.
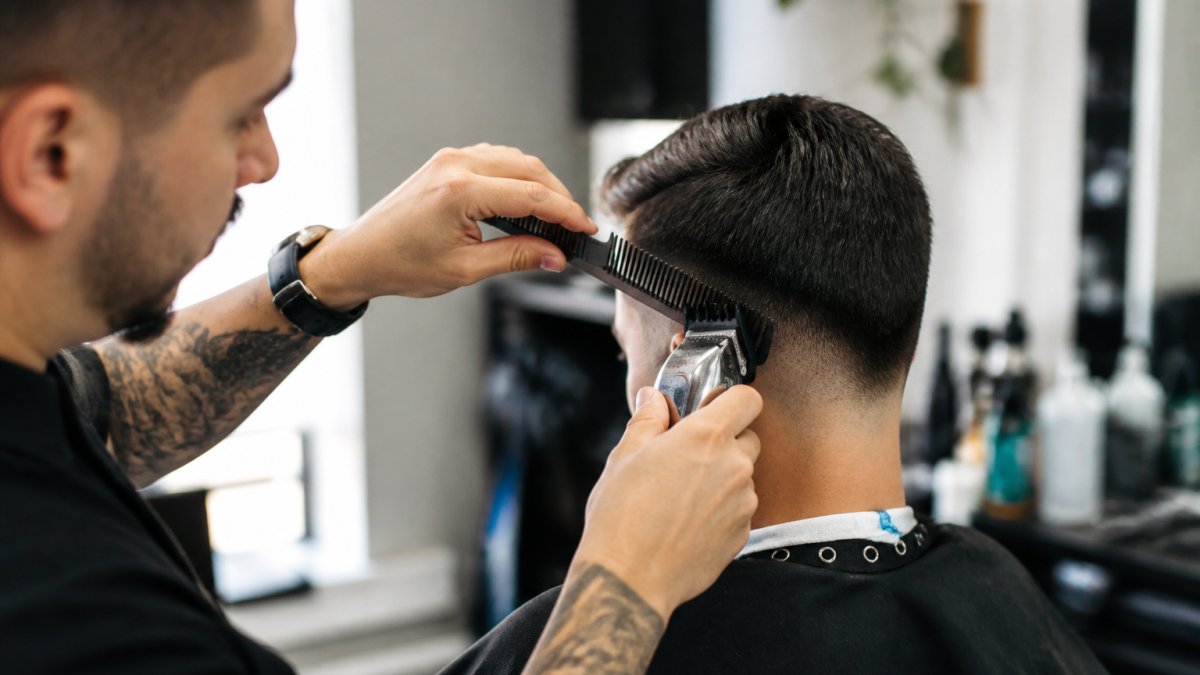
Step 1: Start With Your Lowest Guard
Attach your lowest guard and make your guideline at the nape or sideburn: one clean pass, straight up. Make two or three passes at this guard level to establish the line solidly.
The guideline you create now shapes everything that follows. A crooked guideline creates a crooked fade.
Step 2: Move Upward With Clipper-Over-Comb
Switch to the next guard size and use the clipper-over-comb technique.
Fade Supply Guard Vault — 10 Slot →
Here's how it works:
- Hold the fade comb flat against the head, slightly angled away from the scalp
- Position the clipper blade just above the comb teeth
- Move upward slowly in one smooth motion
- The comb lifts hair into the blade as you move up
The comb controls how much hair gets cut, and the blade cuts what the comb presents, creating a gradual transition. Start at the nape and work upward toward the ear, keeping the motion smooth and deliberate. Jerky movements create uneven lines.
Step 3: Flick and Angle to Avoid Visible Lines
The flick is a key move for blending.
As you move the clipper upward through the blend, flick the blade away from the head at the end of your pass to avoid cutting a new line where the clipper was positioned.
Also angle the clipper slightly as you move upward so the blade follows the curve of the head, preventing harsh lines.
Step 4: Refine With Small Adjustments
After your main blending passes, stand back and look for areas that need refinement, whether a blend that's too sharp or a line you want to soften.
Make small, targeted passes with the lever open for subtle adjustments, not aggressive cutting. Work slowly and check your progress frequently. This refinement step is crucial for professional work.
Common Mistakes to Avoid When Blending
Most blending problems come from a handful of repeated mistakes.
Skipping guard sizes. Jumping from a 1 to a 3 creates a visible line.
Moving the clipper side-to-side. Move upward, not across.
Not using the lever. It's your most powerful blending tool. Open it to soften transitions.
Rushing the blend. Quick, aggressive passes create harsh lines; slow, deliberate passes create smooth blends.
Not checking your work. Stop frequently and look at the fade from different angles.
Hair Type, Texture, and Growth Pattern Adjustments
Not all hair blends the same way. Texture and growth patterns change your approach.
Fine or thin hair shows every line.
Curly hair expands as it dries, so a fade that looks tight wet will look fuller dry.
Straight hair blends predictably, which makes it easier to work with but less forgiving of mistakes.
Growth patterns vary by person, from a swirl at the crown to a strong growth line at the nape.
Diagnosing and Fixing Blend Lines
A visible blend line means the transition between guards is too sharp. Here's how to identify and fix it.
What causes blend lines:
- Skipping guard sizes
- Not using clipper-over-comb technique
- Moving the clipper side-to-side instead of upward
- Not flicking the clipper away at the end of passes
- Inconsistent lever position
How to fix a blend line:
- Identify exactly where the line is. Look from multiple angles to see if it's horizontal or on one side only.
- Make passes above and below the line with a higher guard and the lever open to soften the area gradually.
- Use clipper-over-comb to feather the transition.
- Check your work frequently. One or two additional passes often fix the problem.
If the line is severe, you may need to cut the entire fade shorter and rebuild it. Prevention is key: use adjacent guards, move upward, and flick at the end of each pass.
Professional Tools Make a Difference
The right equipment can make blending easier and faster. A quality clipper holds its blade sharp longer. A good fade comb gives you better control.
For cordless work, the Wahl 5 Star Cordless Senior Clipper offers zero-gap adjustable blades and 70 minutes of runtime.

Both clippers handle high-volume work, staying cool, holding their edge, and delivering consistent results.
Keep your guards organized. The Fade Supply Guard Vault, 10 Slot at $13.99 keeps everything visible and accessible.
Next Steps: Building Your Blending Skill
Blending improves with repetition: the first hundred fades will be rough, but by fade five hundred the technique becomes automatic.
Practice the fundamentals. Master guard transitions. Get comfortable with the lever. Learn to flick and angle. These skills transfer to every fade you cut.
Most importantly, stay patient: blending is a skill that can be learned with deliberate practice and the right tools.
Frequently Asked Questions
How do I blend my own hair with clippers?
Start with the shortest guard on the sides and back, then move up with progressively longer guards. Use clipper-over-comb technique by holding a comb flat against the head and running the clipper upward through it. Keep your movements smooth and consistent, using the lever open to soften transitions between guard lengths. Work in small sections and check your blend from multiple angles using a mirror setup.
Which clipper guard should I use first when blending?
Always start with the lowest guard number you plan to use. If you're creating a fade with guards 0.5, 1, and 2, begin with the 0.5 guard at the nape and sides. This establishes your guideline and ensures you don't accidentally cut hair shorter than intended. Working upward from the shortest length gives you better control and prevents visible blend lines.
How do I blend a line between two clipper guard lengths?
After cutting with your first guard, switch to the next longer guard and overlap slightly into the area you just cut. Use clipper-over-comb work to soften the transition by holding a comb at an angle and moving the clipper upward. Angle the clipper slightly away from the blend line to avoid creating a harsh mark. Make multiple light passes rather than one heavy pass to refine the blend gradually.
Can I blend hair with clipper guards without using a fade lever?
Yes, but using the lever significantly improves your results. With the lever closed, guards cut at full depth for clean lines. With the lever open, the blade retracts slightly, removing less hair and creating softer transitions. You can blend without adjusting the lever by relying on comb angle and clipper movement, but the lever gives you precise control over blend softness.
Shop the tools that make blending easier. At Fade Supply Co, we stock professional-grade clippers, guards, and combs designed by barbers for barbers. Quick shipping keeps your station stocked. Dependable equipment means you never compromise on the work that defines your craft.