

Table of Contents
- Why Keeping Clippers Sharp Matters for Your Craft
- How to Oil Clipper Blades Correctly
- How to Clean Hair Clippers Between Clients
- Signs Your Clipper Blades Are Dull and Need Attention
- Sharpening Your Clippers: DIY vs. Professional
- How Often to Replace Clipper Blades
- Proper Storage to Prevent Rust and Corrosion
- Maintenance Schedule for High-Volume Shops
- Frequently Asked Questions
Last Updated: September 27, 2026
Why Keeping Clippers Sharp Matters for Your Craft
A dull blade doesn't just slow you down, it compromises every cut you make. When you're running a high-volume shop or working mobile, there's no room for equipment that pulls hair, creates uneven lines, or forces you to make multiple passes over the same section. This is where knowing how to keep clippers sharp becomes non-negotiable.
Sharp blades mean cleaner cuts, faster service times, and most importantly, happier clients. A client who feels their hair being pulled will remember that feeling more than they'll remember a perfect fade. The difference between a blade that glides and one that tugs often comes down to maintenance habits most barbers never systematize.
Below, we'll walk you through the exact practices that keep professional clippers performing at their peak, from daily oiling to knowing when professional sharpening is worth the investment.
How to Oil Clipper Blades Correctly
Lubrication is the foundation of blade longevity. Without it, friction builds, heat accumulates, and metal-on-metal wear accelerates. The right oil reduces friction, prevents corrosion, and keeps your blades cutting cleanly through every shift.
Choosing the Right Oil
Not all oils are created equal. Clipper-specific oils are formulated to handle the heat and speed of professional equipment. Standard household oils break down too quickly and can gum up your blades. Andis Clipper Oil is the industry standard, it's designed specifically for the thermal and mechanical demands of professional clippers, providing consistent lubrication without attracting debris.
The viscosity matters. You want an oil thin enough to penetrate between blade teeth but thick enough to create a protective film. Too thin and it evaporates; too thick and it creates drag that slows your clippers. Clipper oil hits that balance precisely.
Daily Oiling Routine
Apply oil to your blades between every client or at minimum every two hours during a high-volume day. This isn't optional if you want to keep clippers sharp and performing. A few drops on the blade edges, then run the clippers for 10 seconds to distribute the oil evenly across the cutting surface.
The frequency matters more than the amount. Small, consistent applications prevent buildup while maintaining protection. Many barbers make the mistake of over-oiling, this creates drag and attracts hair clippings that stick to the blades. A light touch is all you need. If you're using Cool Care spray between clients, that handles both cooling and lubrication in one step, which speeds up your workflow during busy periods.
Store your clippers with the blades slightly separated if possible. This allows air circulation and prevents moisture from being trapped between the cutting surfaces, which accelerates corrosion.
How to Clean Hair Clippers Between Clients
Cleaning removes the debris that accelerates wear and creates hygiene issues. Hair clippings, skin cells, and dried product accumulate in the blade gaps and around the blade guard. Left unchecked, this buildup causes friction, reduces cutting performance, and creates a breeding ground for bacteria.
Quick Cleaning During Your Shift
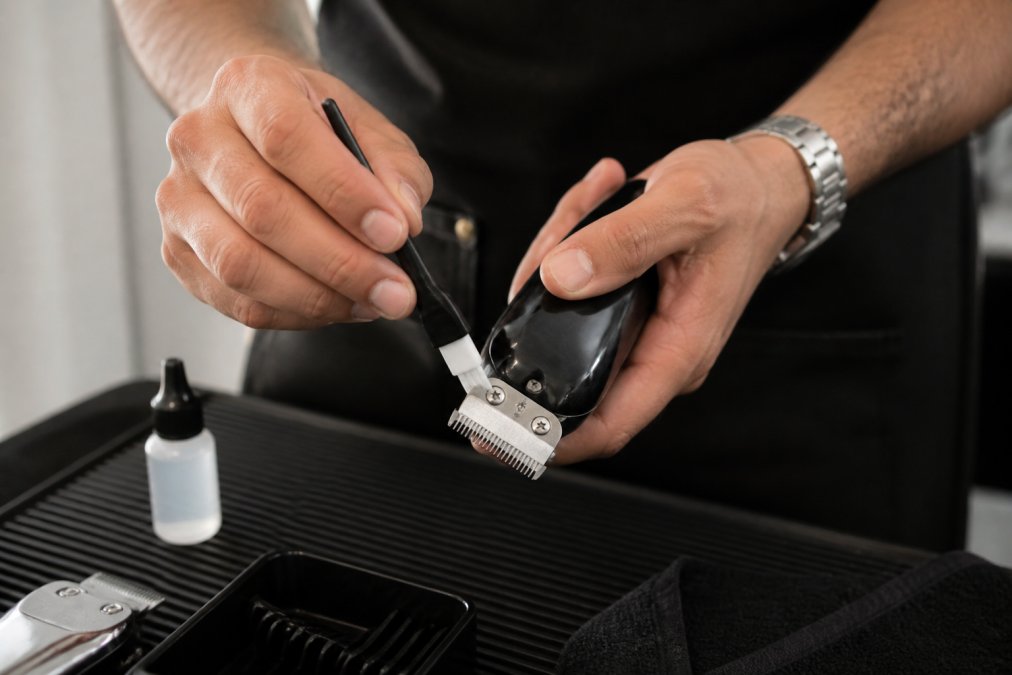
Between clients, use a small brush to remove loose hair from the blade edges and guard. A professional clipper cleaning brush with soft synthetic bristles removes debris without damaging the blade edges. Brush against the direction of the blade teeth to dislodge trapped hair. This takes 30 seconds and makes a measurable difference in how your clippers perform through the day.
Follow the brush with a quick spray of Cool Care or similar disinfectant. This cools the blades after use, kills bacteria, and provides light lubrication. The cooling is especially important in high-volume shops where clippers run continuously. Overheating accelerates blade wear and can eventually warp the blade alignment.
Deep Cleaning at End of Day
At the end of your shift, do a thorough cleaning. Remove the blade guard if your clipper model allows it. Use a small brush to clean around the blade base and guard housing where hair accumulates most. This is where most barbers skip steps, the guard area collects more debris than the blade edges themselves.
For stubborn buildup, soak the blade guard in warm water with a small amount of disinfectant for five minutes, then brush away loosened debris. Dry completely before reattaching. Never leave clippers wet or damp overnight. Moisture trapped between blades creates corrosion that dulls edges and causes mechanical failure.
Keep a disinfecting jar like the Fade Supply Acrylic Disinfecting Jar or Classic Disinfecting Jar at your station. This keeps your tools organized and sanitized between clients, which is both a hygiene requirement and a practical way to prevent blade deterioration from sitting in contaminated environments.

Signs Your Clipper Blades Are Dull and Need Attention
Recognizing dullness early prevents frustration during cuts and tells you when to adjust your maintenance schedule. A dull blade has a specific feel and sound that experienced barbers pick up immediately, but there are objective signs to watch for.
The most obvious indicator is hair pulling. If a client mentions their hair being pulled or you feel resistance during a cut that wasn't there before, your blades have dulled. This happens gradually, you might not notice the decline until a client points it out. Test your blades on your own arm hair. A sharp blade glides; a dull one catches and pulls.
Uneven cutting is another red flag. If your fade lines look ragged or require multiple passes to clean up, blade dullness is usually the cause. This is especially noticeable on tight fades where precision matters most. A sharp blade cuts cleanly in a single pass; a dull blade leaves a fuzzy edge that requires correction.
Listen to the sound. A sharp clipper has a consistent hum. If the pitch changes, the motor is working harder because the blades are creating more friction. This change in sound often precedes visible performance loss by a few days.
Thermal buildup is another signal. If your clippers get noticeably hotter than usual during normal use, friction from dull blades is the likely cause. This heat accelerates further blade wear and can eventually damage internal components.
Sharpening Your Clippers: DIY vs. Professional
This is where many barbers make the wrong call. The choice between DIY sharpening and professional service depends on your volume, skill level, and how much downtime you can afford.
DIY Sharpening with a Honing Stone
A honing stone can extend blade life between professional sharpenings. The key is understanding that honing and sharpening are different processes. Honing realigns the blade edge and removes minor buildup. It won't restore a severely dulled blade, but it can restore 70-80% of cutting performance if done correctly.
The angle matters. Clipper blades are typically honed at a 10-15 degree angle. Too steep and you'll damage the edge; too shallow and you won't realign it properly. Many barbers find the angle difficult to maintain consistently, which is why professional sharpening often delivers better results.
Use light pressure. The goal is to realign the edge, not remove metal. Multiple light passes work better than one heavy pass. After honing, test on your arm hair. If you've restored the edge correctly, the blade will glide without pulling.
DIY honing works as a maintenance tool between professional sharpenings, but it's not a replacement for professional service. If your blades are significantly dulled, honing won't fully restore them.
When to Send Clippers for Professional Sharpening
Professional sharpening uses precision equipment that maintains exact blade angles and removes metal strategically to restore the cutting edge. This is worth the cost and downtime if your blades are significantly dulled or if you're running high-volume and need maximum performance.
Most professional sharpening services take 5-10 business days. Plan ahead, don't wait until your primary clippers are dull to send them in. Rotate through backup clippers so you don't lose income during the turnaround. For high-volume shops, this means keeping at least two sets of clippers so one is always available.
The cost of professional sharpening is far cheaper than replacing clippers frequently.
How Often to Replace Clipper Blades
Replacement isn't the same as sharpening. Even a professionally sharpened blade eventually reaches the end of its useful life. Blade metal has a finite amount of material that can be removed before the blade becomes too thin to function safely.
The difference is maintenance discipline.
Signs that replacement is necessary rather than sharpening: the blade won't hold an edge even after professional sharpening, the blade has visible nicks or damage that can't be honed out, or the blade is so thin it flexes during use.
Proper Storage to Prevent Rust and Corrosion
Storage conditions determine how quickly your blades deteriorate between uses. Heat, moisture, and exposure to corrosive materials all accelerate blade degradation.
Maintenance Schedule for High-Volume Shops
Consistency is what separates shops with reliable equipment from those constantly fighting blade problems. A documented maintenance schedule ensures nothing gets skipped.
Frequently Asked Questions
What is the best oil for hair clipper blades?
Professional-grade clipper oils like Andis Clipper Oil are formulated specifically for blade lubrication and friction reduction. These oils penetrate the blade alignment and moving parts without leaving residue. The Fade Supply Maintenance Kit includes Andis Clipper Oil 4 oz., which keeps blades running smooth and prevents overheating during heavy use. Avoid household oils like WD-40, which can attract dust and degrade cutting performance over time.
How often should clippers be sharpened?
In a high-volume shop, clippers typically need professional sharpening every 3-6 months, depending on daily usage. Solo barbers or mobile professionals may extend this to 6-12 months. Between professional sharpenings, use a honing stone weekly to maintain blade edge and cutting performance. If you notice hair pulling or uneven cuts, that's a sign sharpening is overdue. Regular oiling and cleaning extend the time between sharpenings significantly.
Can you sharpen clipper blades at home?
Yes, you can perform basic honing at home using a diamond grit honing stone to maintain blade edge between professional sharpenings. This prevents thermal buildup and extends blade life. However, professional sharpening requires specialized equipment and expertise to restore the precise sharpening angle and blade tension needed for consistent cutting performance. DIY honing works well for maintenance; professional sharpening is best for restoration.
How do I prevent clipper blades from rusting?
Rust prevention starts with regular oiling and proper storage. After cleaning, apply a light coat of clipper oil to all metal surfaces to create a barrier against corrosion. Store clippers in a dry environment, away from moisture and humidity. The Fade Supply Maintenance Kit includes everything needed for hygiene maintenance and rust prevention. Use a disinfecting jar like the Fade Supply Classic Disinfecting Jar (45.5 oz) for organized storage that protects blades between uses.