

Table of Contents
- What Zero Gapping Does to Your Cutting Blade
- Clean and Prep the Clipper Before Blade Adjustment
- Tools You Need for Zero Gapping Professional Clippers
- Step-by-Step: How to Zero Gap Professional Clippers
- Your Clipper Blade Alignment Guide: Checking the Safety Gap
- How to Prevent Clipper Burn After Zero Gapping
- Best Zero Gap Trimmers for Professional Use
- When to Zero Gap vs. Keep Factory Settings
- Frequently Asked Questions
Last Updated: September 16, 2026
What Zero Gapping Does to Your Cutting Blade
Zero gapping means adjusting a clipper's cutting blade so its teeth sit flush with, or slightly behind, the stationary blade's teeth, eliminating the gap that leaves visible lines in a fade. Learning how to zero gap professional clippers gives you the blade bite for skin-tight blends without a second trimmer pass.
The change is mechanical: factory settings leave a small safety gap between the blade rows, and closing it shortens the cutting surface's effective length, so the blade cuts closer to the scalp and produces cleaner blend lines.
It also changes how the tool behaves: a zero-gapped blade cuts faster and hotter, so technique matters more, not less. This guide from Fade Supply Co covers the adjustment, safety checks, and maintenance that keeps the blade cutting the same way six months from now.
Clean and Prep the Clipper Before Blade Adjustment
Never adjust a dirty blade. Hair, lint, and dried product pack into the teeth and change how the two rows sit, so any alignment you set on a dirty blade will be wrong once it's clean.
Remove the blade and brush out the teeth with the small cleaning brush that ships with most professional clippers.
Tools You Need for Zero Gapping Professional Clippers
You need three things: a small flathead screwdriver that fits the blade screws exactly, a clean work surface with good light, and a way to check alignment. Most professional clippers use one small screw to lock the cutting blade; some use two.
- Screwdriver: Match the tip width to the screw slot. A loose fit strips the head.
- Pro-set tool or alignment tool: Holds the blade at a consistent offset while you tighten. Helpful, not mandatory.
- Clipper oil: For lubrication before and after adjustment.
- Cleaning brush: For blade teeth before you start.
- Magnifying light or phone camera: For checking alignment at close range.
Step-by-Step: How to Zero Gap Professional Clippers
The full adjustment takes about ten minutes on most corded and cordless clippers. Work on a clean surface with the clipper powered off, and keep the blade screws in a small dish so they don't roll away.
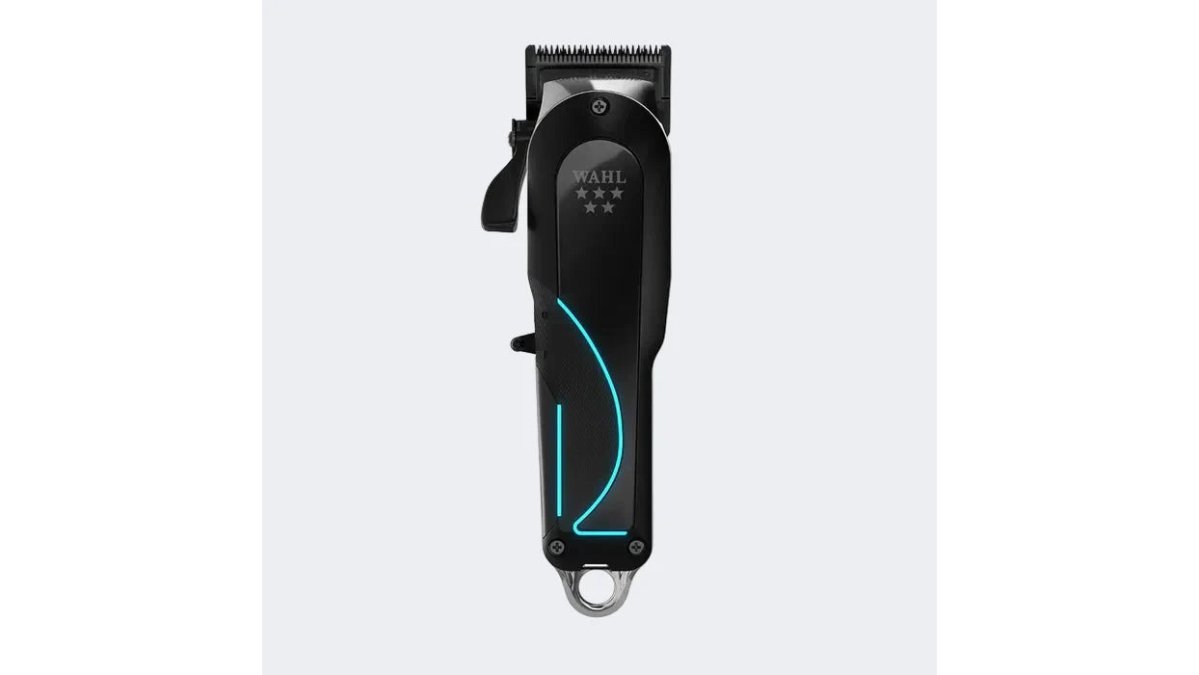
Step 1: Remove the Cutting Blade and Clean the Blade Teeth
Take the blade off and set it face-up. Brush both the cutting and stationary blades until no hair remains between the teeth. Look along the front edge at a low angle; if debris is wedged in the slots, keep brushing, any grit left in place throws off alignment by its own thickness.

Step 2: Loosen the Blade Screws and Slide the Cutting Blade Forward
Loosen the blade screws just enough that the cutting blade slides under finger pressure, don't remove them. Push the cutting blade toward the stationary blade in small increments, checking alignment after each one. The goal is flush teeth, or a hair behind, never past.
Step 3: Align the Cutting Blade and Tighten the Screws
Hold the blade in position and tighten the screws evenly. With two screws, tighten in small alternating turns so the blade doesn't shift sideways as the second seats. Then press the taper lever through its full range to confirm the blade moves freely and returns cleanly.
Step 4: Run a Heat Check Before the First Client
Run the clipper for a full minute with no load, then feel the blade housing. A correctly zero-gapped blade on a healthy motor warms slightly; it shouldn't get hot enough to be uncomfortable against the back of your hand. If it does, back the cutting blade off a hair and re-check. Persistent heat means the motor can't handle the added resistance, return that clipper to factory settings and use it for bulk work.
Wahl 5 Star Cordless Senior Clipper →
Your Clipper Blade Alignment Guide: Checking the Safety Gap
A clipper blade alignment guide is simply a method for checking that the two blade rows sit correctly relative to each other. The check takes seconds and separates a blade that fades cleanly from one that irritates every client.
How to Read the Gap at a Glance
Hold the clipper with the blade facing you and sight along the front edge at eye level, with a light source behind the blade so the gap shows as a bright sliver. Compare what you see to these three states:
- Correctly zero gapped: The cutting blade teeth sit level with the stationary blade teeth, or the cutting blade sits a fraction behind. At eye level you see a single row of teeth with no light passing between the two rows. Run a fingernail across the front edge, it should catch on the stationary teeth and glide over the cutting teeth with no lip.
- Under-gapped (safe but leaves lines): A visible sliver of light runs between the two rows. The cutting blade sits clearly behind the stationary blade. This is the factory safety gap. It will not cut skin, but it will leave a line in a fade that you have to chase with multiple passes.
- Over-gapped (dangerous): The cutting blade teeth extend past the stationary blade teeth. At eye level you see the cutting teeth protruding in front of the stationary row, and the front edge feels like a step rather than a flat plane. This is the state that catches skin, strains the motor, and runs hot.
| Alignment Result | What You See | What It Does |
|---|---|---|
| Correctly zero gapped | Teeth flush or cutting blade a hair behind; no light between rows | Clean fades, no lines |
| Under-gapped | Visible sliver of light between blade rows | Leaves lines, needs multiple passes |
| Over-gapped | Cutting blade extends past stationary blade; front edge feels like a step | Catches skin, strains motor, runs hot |
The Heat and Drag Test
Visual checks catch alignment. The heat and drag test catches the consequences. Run the clipper for thirty seconds after adjustment and feel the blade housing. A blade that heats up fast is usually over-gapped or under-lubricated. Both are fixable in under a minute.
How to Prevent Clipper Burn After Zero Gapping
Knowing how to prevent clipper burn matters more once a blade is zero gapped, because it sits closer to skin and generates more friction. Clipper burn shows up as redness and irritation along the neck and jawline, and it costs you repeat clients faster than a bad fade.
Best Zero Gap Trimmers for Professional Use
The best zero gap trimmers and clippers for professional use are built with adjustable blades out of the box, so you're fine-tuning a blade designed for it rather than forcing a consumer tool past its limits. Fade Supply Co stocks several that hold up under daily shop use.
| Clipper | Run Time | Blade | Best For |
|---|---|---|---|
| 5 Star Cordless Senior | 70 min | 2191, zero-overlap adjustable | Precision fades and tapering |
| 5-Star Senior 2.0 | Cord/cordless | DLC-coated, zero-gap adjustable | High-volume shops |
| 5 Star Cordless Legend | 100 min | Wedge blade | Mobile and independent barbers |
| 5 Star Magic Clip | 100 min | Titanium and DLC coated | Multi-chair shops stocking up |
When to Zero Gap vs. Keep Factory Settings
Factory settings exist for a reason, and not every clipper should be adjusted. Keep the factory gap for bulk removal, clipper-over-comb work, or clients with coarse, dense hair where a closer blade risks catching. The safety gap also protects clients with sensitive skin or scalp conditions.
Frequently Asked Questions
Are you supposed to zero gap your clippers?
Not always. Zero gapping is optional and works best for barbers who do a lot of fades, tapers, and line work. It brings the cutting blade closer to the stationary blade for a tighter cut. If you mostly do bulk removal or use guide combs, factory settings are fine. Test on your own arm first and check for skin irritation before using it on clients.
How should zero gap clippers look?
The cutting blade teeth should sit just barely behind the stationary blade teeth, with no visible gap between them. When you look at the blade from the side, the two rows of teeth should almost touch but not overlap. If the cutting blade sticks out past the stationary blade, you have over-gapped it and need to back the blade off.
What are the best zero gap trimmers for professional use?
Look for clippers with adjustable blades and enough motor power to handle tight gaps. The Wahl 5 Star Cordless Senior Clipper has 2191 blades with zero-overlap capability and a rotary motor that holds speed through thick hair. The Wahl Professional 5-Star Senior 2.0 adds a DLC-coated blade and up to 8,000 RPM. Both are built for daily shop use and take blade adjustment well.
Can zero gapping cause skin irritation or cuts?
Yes, if you push the blade too far forward or skip lubrication. A zero-gapped blade runs closer to the skin, which raises the risk of razor burn and nicks. Keep a small safety gap, oil the blade before every use, and let the blade cool between clients. If a client has sensitive skin, use a slightly less aggressive gap or switch to a clipper with a cooler-running blade.