

Table of Contents
- Why Professional Barber Clipper Repair Matters
- How to Keep Clippers Sharp: Blade Cleaning and Sanitation
- Barber Clipper Blade Alignment Guide: Precision Adjustments
- Lubrication and Oiling Frequency for Peak Performance
- Troubleshooting Clipper Motor Issues: Diagnostics by Motor Type
- DIY vs. Professional Repair: Cost-Benefit Decision Framework
- Safety Protocols for Electrical Repairs
- Building a Maintenance Schedule for Tool Longevity
- Frequently Asked Questions
Last Updated: October 1, 2026
Why Professional Barber Clipper Repair Matters
Taking care of your clippers isn't just maintenance, it's the difference between a smooth fade and a pulling, frustrating experience that costs you clients. Professional barber clipper repair tips matter because clippers are precision instruments. They're also your biggest investment after your chair.
A clipper that pulls hair, vibrates, or stalls doesn't just slow you down. It damages your reputation. Clients notice immediately. They feel the difference between a tool that glides and one that tugs.
The good news: most clipper problems are preventable. You don't need expensive repairs if you catch issues early. A few minutes of daily maintenance adds years to your tools. This guide covers exactly what you need to know to keep your clippers performing like new.
How to Keep Clippers Sharp: Blade Cleaning and Sanitation
Clean blades cut better. Hair, skin cells, and clipper oil build up on your blades. This buildup dulls the cutting edge and creates friction. Friction causes heat, vibration, and motor strain.
The solution is simple: clean your blades daily and sanitize between clients.
Daily Cleaning Routine
Start each morning with a basic cleaning. This takes two minutes.
Here's what to do:
- Brush dried hair and debris from the blade teeth with a soft brush
- Wipe the blade with a dry cloth
- Check for visible buildup in the blade gap
- If you see gunk, use a small brush or old toothbrush to gently scrub the blade edges
- Never use water on the blade, it rusts the metal and damages the motor
The Barbicide Disinfectant product includes everything you need for this routine. Keep it at your station.
Deep Sanitation Between Clients
Every client gets a fresh set of clippers. This is non-negotiable for health and client trust.
Between clients, do a deep clean:
- Soak the blade in Barbicide solution for 10 minutes
- Use a soft brush to scrub away any remaining hair or debris
- Rinse with water (yes, water is fine for short soaks)
- Dry completely with a clean cloth
- Apply a thin coat of clipper oil to the blade
This process kills bacteria and fungus. The Barbicide solution is EPA-registered hospital-grade disinfectant that complies with OSHA bloodborne pathogen standards. It's the industry standard for good reason.

Many barbers skip this step because it feels slow. But a contaminated blade damages your reputation faster than a dull one. Clients talk. One infection complaint spreads through your neighborhood.
| Task | Frequency | Time |
|---|---|---|
| Brush debris from blades | Daily morning | 1 minute |
| Wipe with dry cloth | Daily morning | 1 minute |
| Soak in Barbicide | Between every client | 10 minutes |
| Brush and dry | Between every client | 2 minutes |
Barber Clipper Blade Alignment Guide: Precision Adjustments
Blade alignment is where amateurs lose clients. A misaligned blade pulls hair instead of cutting it. The client feels the difference immediately. Your fade looks sloppy. Your reputation takes a hit.
Proper blade alignment means the top and bottom blades meet at exactly the right gap. Too tight and the motor strains. Too loose and you don't cut hair. You need precision.
Checking Blade Gap and Tension
Before you adjust anything, check what you're working with.
Here's the process:
- Power off the clipper completely
- Look at the blade from the side
- The top blade should sit just barely above the bottom blade
- There should be a small gap, about the thickness of a human hair
- Run your finger gently across both blades (carefully, they're sharp)
- Both blades should feel smooth with no catches or rough spots
If the gap looks uneven or the blades feel rough, alignment is your problem.
Adjusting the Tension Screw
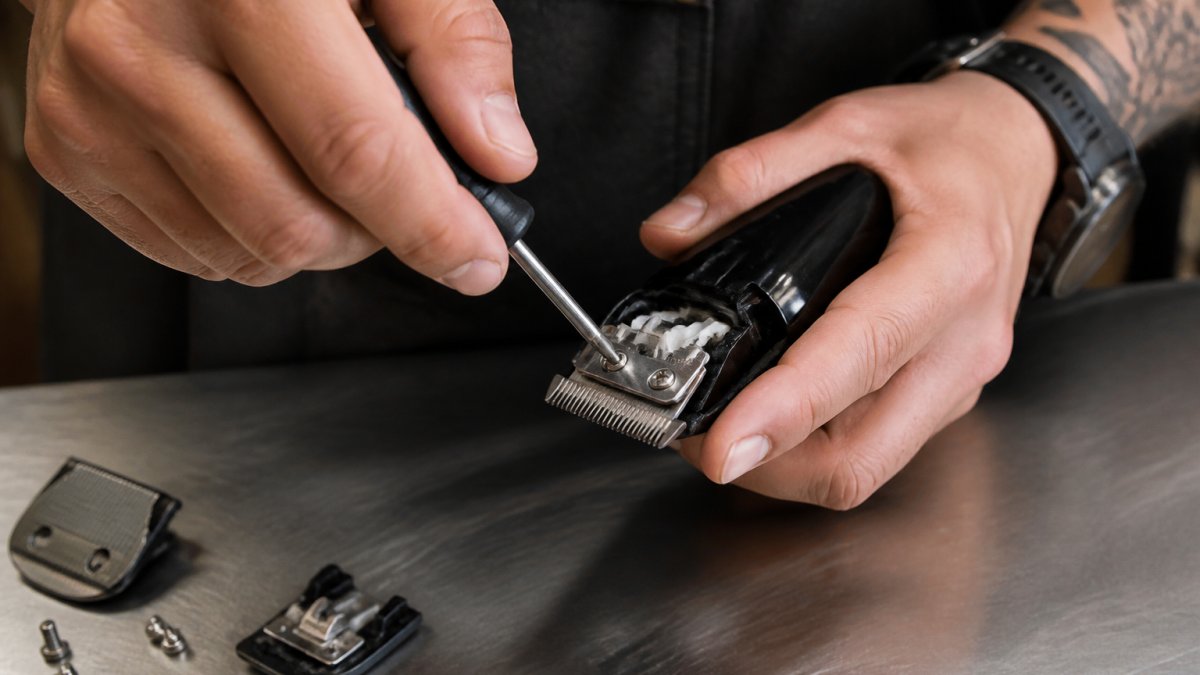
The tension screw controls blade pressure. It's usually located on the side of the clipper housing.
Follow these steps:
- Locate the small screw on the side of the clipper (your manual shows exactly where)
- Use a small Phillips head screwdriver, not a larger one that will strip the screw
- Turn clockwise to tighten (increases blade pressure)
- Turn counterclockwise to loosen (decreases blade pressure)
- Make small adjustments, quarter turns only
- Test the clipper after each adjustment
The blade should glide smoothly without resistance. If you feel grinding or hear clicking, stop immediately. You've gone too far.
A common mistake is over-tightening. This burns out your motor. Under-tightening means the blade doesn't cut. Start loose and tighten gradually until the blade glides smoothly.
Lubrication and Oiling Frequency for Peak Performance
Oil keeps your clipper motor running smooth. Without it, friction builds up. Friction creates heat. Heat kills motors.
You need to oil your clippers daily. Not weekly. Daily.
Here's why: every cut generates friction between the blade and hair. That friction heats the blade and motor. Oil reduces friction and dissipates heat. A dry clipper overheats in minutes.
Use clipper-specific oil only. Never use sewing machine oil, 3-in-1 oil, or WD-40. These oils are too thick or too thin. They gum up or evaporate. Clipper oil is formulated for the specific temperature and speed of a barber clipper motor.
The routine is simple:
- Apply 2-3 drops of clipper oil to the blade teeth before your first client
- Apply 1-2 drops between every 2-3 clients
- Never apply more than 3 drops at once, excess oil attracts hair and debris
- Wipe away any visible oil with a cloth before cutting
The Fade Supply Maintenance Kit includes Andis Clipper Oil, which is the industry standard. It's formulated to cool the blade and reduce friction without breaking down under high heat.
Many barbers forget to oil their clippers. Then they wonder why the clipper gets hot and stalls. Heat stall is preventable with basic oiling.
Troubleshooting Clipper Motor Issues: Diagnostics by Motor Type
Motor problems are the most expensive repair. But most motor issues start as small problems you can diagnose and fix yourself.
The first step is identifying your motor type. Different motors have different failure patterns.
Identifying Your Motor Type
Three motor types dominate professional barber clippers: pivot motor, rotary motor, and magnetic motor.
Pivot motor. The blade moves up and down. You'll see the blade vibrating vertically. Pivot motors are common in budget clippers. They're durable but less precise.
Rotary motor. The blade spins in a circular motion.
Diagnosing Vibration, Noise, and Stalling
Vibration, noise, and stalling are three different problems with three different fixes.
DIY vs. Professional Repair: Cost-Benefit Decision Framework
Knowing when to repair yourself and when to call a professional saves money and downtime.
DIY repairs work for:
- Blade alignment and tension adjustment
- Daily cleaning and oiling
- Removing hair debris and buildup
- Replacing clipper oil or disinfectant
Professional repairs are necessary for:
- Carbon brush replacement
- Motor bearing replacement
- Electrical continuity issues
- Cord damage or strain relief failure
- Complete motor replacement
Safety Protocols for Electrical Repairs
Never attempt electrical repairs yourself unless you're trained. Clipper motors run on electricity. Mistakes can cause injury or fire.
Here's what you need to know:
- Never work on a plugged-in clipper
- Never immerse the motor or cord in water
- Never attempt to repair a damaged cord yourself
- If the cord is frayed or cracked, stop using the clipper immediately
- A damaged cord is a fire and shock hazard
Building a Maintenance Schedule for Tool Longevity
A maintenance schedule keeps your clippers running and prevents expensive repairs.
Here's a simple schedule:
Daily:
- Clean blades in the morning
- Oil blades before your first client
- Oil between every 2-3 clients
- Sanitize between every client
Weekly:
- Deep clean the clipper housing with a soft brush
- Check blade alignment
- Check for visible wear on the cord
Monthly:
- Inspect the tension screw for damage
- Check the cord strain relief
- Verify the clipper powers on and off smoothly
Every 6 months:
- Have a professional inspect the motor and bearings
- Replace the cord if it shows any damage
- Check carbon brush wear
Every 12-18 months:
- Replace carbon brushes (if heavy use)
- Have the motor serviced professionally
- Inspect all replacement parts
Frequently Asked Questions
How often should you sharpen barber clipper blades?
Professional barbers should sharpen clipper blades every 6-8 weeks with regular daily use, depending on volume and client density. High-volume shops may need sharpening every 4-6 weeks. Rather than attempting DIY sharpening, which risks damaging the blade edge, send blades to a professional sharpening service. In the meantime, maintain cutting performance through daily cleaning, proper lubrication with clipper oil, and correct blade alignment. A dull blade pulling hair signals it's time for professional sharpening.
What are the signs that a clipper motor is failing?
Watch for excessive vibration, unusual grinding or buzzing noise, inconsistent cutting power, the motor stalling mid-cut, or the clippers overheating after short use. These indicate worn carbon brushes, bearing damage, or magnetic motor issues. Test electrical continuity with a multimeter if you have experience; otherwise, stop using the clippers immediately. Continuing to use a failing motor can cause complete breakdown and create safety risks. Professional repair is recommended to diagnose whether the motor can be restored or the clipper needs replacement.
Can you use rubbing alcohol to clean barber clippers?
No, avoid rubbing alcohol for clipper disinfection. It can damage seals, corrode internal components, and leave residue that interferes with blade movement. Instead, use Barbicide Disinfectant, the EPA-registered hospital-grade standard for the barbering industry. Barbicide complies with OSHA's bloodborne pathogens standard and kills HIV-1, Hepatitis B, Hepatitis C, staph, and fungus. The Fade Supply Maintenance Kit includes Barbicide along with Andis Clipper Oil and Cool Care spray for comprehensive cleaning and disinfection between clients.
Is WD-40 good for clipper blades?
No, WD-40 is not appropriate for clipper blades. It leaves a sticky residue that attracts hair and dirt, clogs blade gaps, and reduces cutting precision. It also lacks the lubricating properties clipper oil provides. Use only clipper-specific oil like Andis Clipper Oil, which reduces friction, prevents overheating, and maintains smooth blade movement. Apply a light coat to the blade every few cuts during your workday, and use Andis Cool Care spray for quick cooling and cleaning between clients. Proper lubrication extends blade life and ensures consistent fade quality.