

Last Updated: October 23, 2026
Quick Summary
Prevent skin irritation from hair clippers by cleaning and disinfecting blades before and after every client, keeping blades sharp, and using light, even pressure with fewer passes. Clip with the grain first, set the right guard for each area, and finish with a cool rinse rather than a hot towel.
- Dull blades pull hair instead of cutting it cleanly, and dirty blades carry bacteria into fresh follicles.
- Brush loose hair off the blade, spray disinfectant for the full label contact time, then oil and run the clipper.
- Clip with the grain first to remove bulk, saving against-the-grain work for the tightest areas.
- Do not stretch the neck skin tight while clipping, since it lets the blade cut below the natural skin line.
- Redness that fades within a day is usually clipper burn; bumps that spread, hurt, or fill with pus need a doctor.
Table of Contents
- Why Hair Clippers Cause Skin Irritation
- Prep the Skin and Hair Before You Clip
- How to Clean and Disinfect Hair Clippers
- Technique Fixes: Pressure, Passes, and Direction of Hair Growth
- How to Prevent Razor Bumps From Clippers
- Clipper Burn Treatment: What to Do After Irritation Appears
- Best Products for Razor Burn Relief and Blade Care
- Conclusion
- Frequently Asked Questions
Why Hair Clippers Cause Skin Irritation
Skin irritation from hair clippers is damage to the outer layer of skin caused by friction, heat, and bacteria from the blade. This is most often seen when a blade is dull, dirty, or pressed too hard against the scalp.
Three things drive most irritation:
- Dull blades pull hair instead of cutting it cleanly
- Dirty blades carry bacteria and old hair into fresh follicles
- Too much pressure scrapes the skin with every pass
The good news is that all three are fixable. Below, we break down the full process, from prep to aftercare, so you can send clients home with calm skin instead of angry bumps.
Prep the Skin and Hair Before You Clip
Prep starts before the clipper touches the head.
Start with a shower or a warm towel. Warm water softens hair and opens follicles slightly.
Next, check the scalp with your fingers. Look for existing bumps, scabs, or tender spots.
Run a light pass with a soft brush to lift dead skin and loose hair. Do not scrub hard.
Finally, apply a small amount of clipper-safe lubricant or a light gel along the areas you plan to clip tight.
How to Clean and Disinfect Hair Clippers
Clean blades are the single biggest factor in preventing irritation. A blade that carries hair, oil, and bacteria will push all three into the skin with every pass.
Clean and disinfect clippers before and after every client. This is not optional in a busy shop. For a repeatable daily clipper cleaning routine for barbers, follow this step-by-step guide.
Here is the routine we recommend:
- Brush loose hair off the blade with a stiff blade brush
- Spray the blade with a disinfectant spray and let it sit for the full contact time on the label
- Wipe the blade dry with a clean towel
- Add a drop or two of clipper oil and run the clipper for a few seconds
- Wipe off excess oil before the next cut
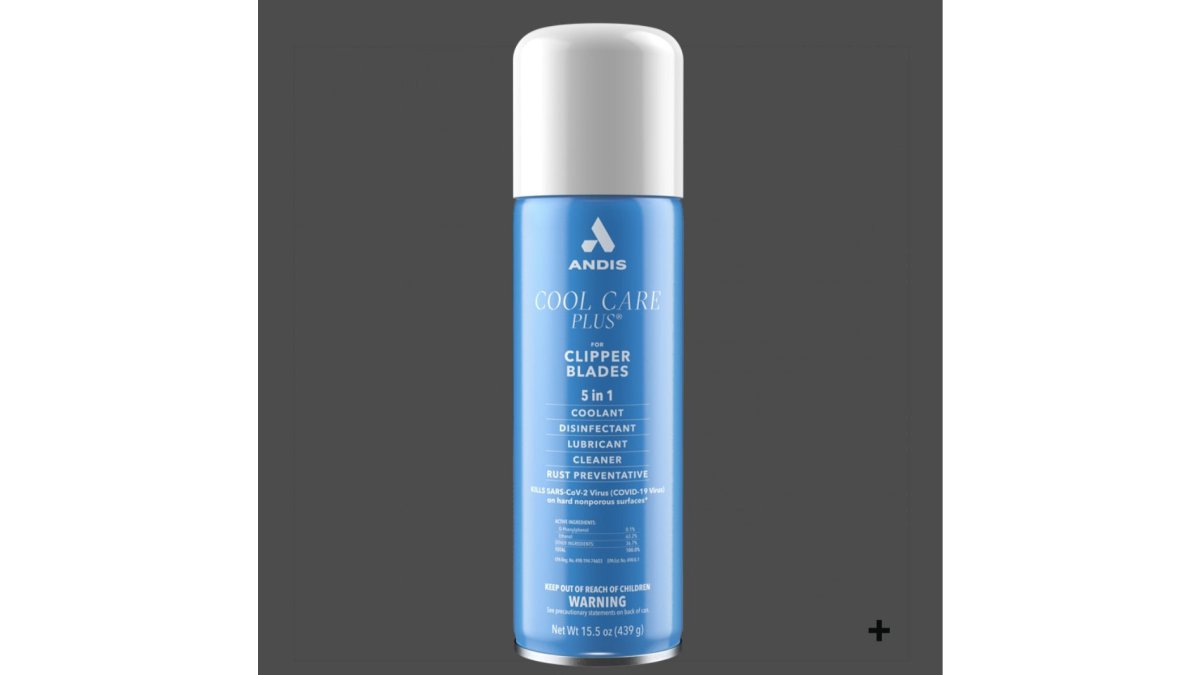
For a spray that does the work in one step, Clippercide Spray 15oz disinfects, cleans, lubricates, cools, and prevents rust. If you want a coolant option between cuts, Andis Cool Care 15.5 oz. cleans, disinfects, and lubricates blades without removing them from the clipper.

Technique Fixes: Pressure, Passes, and Direction of Hair Growth
Technique causes more clipper burn than any product.
Pressure: Let the blade do the cutting. Grip the clipper firmly but do not push it into the scalp.
Passes: Every extra pass adds friction.
Speed: Keep the process short. A long, slow session with repeated passes heats the blade and irritates skin.
Set your clipper to the right guard for the length you want.
How to Prevent Razor Bumps From Clippers
Razor bumps, also called ingrown hairs, form when a cut hair retracts below the skin surface and curls back into the follicle instead of growing out.
Clipper bumps differ from razor burn. Razor burn is surface redness and stinging that shows up within hours. Bumps are raised, appear a day or two later, and often itch or feel tender. If you see a raised bump with a dark center or a trapped hair loop, that is an ingrown hair, not simple burn.
Clipper-specific prevention
- Set the guard for the area, not the whole head. Use a longer guard on the neck and hairline than on the sides and top. A guard that is too short forces you to press harder and cut closer than the skin tolerates.
- Keep the blade flat and let the teeth do the work. Tipping the clipper so the corner of the blade digs in concentrates pressure on a small patch of skin and is a common cause of bumps at the nape.
- Limit passes over any one spot. Plan the line before you start. Two clean passes beat five corrective ones, and every extra pass adds friction and pushes cut hair toward the follicle.
- Do not stretch the neck skin tight while clipping. Stretching lifts the hair and lets the blade cut below the natural skin line; when the skin relaxes, the cut end sits under the surface. Let the client keep the neck relaxed and slightly chin-down instead.
- Clip with the grain on the first pass. Going against the grain on the first pass lifts hair and drags the blade across skin. Save any against-the-grain work for the tightest areas and only after bulk is removed.
- Brush the blade between passes on the neck and hairline. Hair packed between the teeth reduces cutting efficiency and increases drag.
Adapting for coarse, curly hair and sensitive skin
Coarse or curly hair is more likely to curl back after cutting, so the guard length matters more than the blade brand.
A light exfoliation a few days after the cut, once the skin has calmed, helps release hairs that are starting to curl. Do not exfoliate the same day as the cut; the skin is already compromised and scrubbing makes redness worse.
If a client regularly gets bumps in the same spot, note the guard length and pass pattern you used and change one variable at a time on the next visit. That is more reliable than switching products.
Clipper Burn Treatment: What to Do After Irritation Appears
Clipper burn treatment starts with cooling the skin and stopping the friction. If redness or stinging shows up, do not clip over that area again during the same visit, and tell the client to leave it alone for a few days.
Here is what to do:
- Rinse the area with cool water to remove loose hair and product
- Pat dry with a clean towel, do not rub
- Apply a cool compress for a few minutes to calm redness
- Use a thin layer of hydrocortisone cream on mild irritation, following the label directions and not using it on broken skin without a doctor's guidance
- Keep the area clean and avoid tight hats, helmets, or friction for a day
What not to put on irritated skin
Do not apply rubbing alcohol, witch hazel with a high alcohol content, or strongly fragranced aftershaves to broken or inflamed skin. They sting, strip the skin barrier, and slow recovery. Avoid scrubbing the area with a brush or exfoliant in the days right after irritation appears. If the skin is weeping or broken, skip the hydrocortisone unless a doctor advises it and keep the area clean and dry instead.
Irritation vs. infection vs. contact dermatitis
Most clipper irritation is simple friction burn: redness and stinging that fade within a day or two. Watch for signs that the problem has moved past that:
- Folliculitis: small red bumps or pustules centered on hair follicles, often itchy or tender, that appear a day or two after clipping and may spread. This is inflammation or infection of the follicle, not simple burn.
- Contact dermatitis: redness, itching, and sometimes small blisters in the pattern where a product touched the skin, such as a clipper spray, lubricant, or aftershave. It can appear hours to a day after exposure.
- Infection: spreading redness, warmth, swelling, pus, or fever. Refer the client to a doctor.
A practical rule: redness that fades within a day is usually clipper burn. Bumps that spread, hurt, or fill with pus, or a rash that follows the shape of a product application, need medical attention rather than another product.
For the shop, logging what was used on the client (guard length, lubricant, spray) when irritation appears can help identify patterns. If the same product is followed by the same reaction on more than one client, stopping its use and thoroughly cleaning and disinfecting the clipper before the next cut is advisable.
Best Products for Razor Burn Relief and Blade Care
The best products for razor burn relief calm the skin, while blade care products keep the clipper from causing the problem again.
For skin, keep a gentle cleanser, a cool compress, and hydrocortisone cream on hand. For blades, sharp and clean tools matter more than any cream.
Blade care products we stock and trust:
- Andis Clipper Oil 4 oz. lubricates and cleans all clipper and trimmer blades, and regular use keeps blades cutting clean
- Andis Blade Care Dip Jar 16 oz. washes away hair and buildup, then leaves blades clean, cool, and lubricated
| Product | What It Does | Best For |
|---|---|---|
| Clippercide Spray 15oz | Disinfects, cleans, lubricates, cools, prevents rust | Daily station disinfection |
| Andis Cool Care 15.5 oz. | Cleans, disinfects, lubricates without removing blades | Quick between-cut care |
| Andis Clipper Oil 4 oz. | Lubricates and cleans blades | Routine blade upkeep |
| Andis Blade Care Dip Jar 16 oz. | Washes away hair and buildup | Deep blade cleaning |
A dull blade is the most common cause of clipper irritation. If a blade pulls or needs extra pressure to cut, replace it.


Conclusion
Clipper irritation is a process problem, not bad luck. Clean blades, light pressure, and a short, well-planned cut prevent most of it before it starts.
Fade Supply Co stocks the professional-grade station essentials that make this routine easy. Our veteran-owned shop carries dependable cleaning and blade care products, ships fast to keep your station stocked, and backs every order with secure checkout.
Frequently Asked Questions
How do I stop razor bumps from clippers?
Start with clean, sharp blades and a disinfected clipper before every client. Clip in the direction of hair growth, keep pressure light, and avoid repeated passes over the same spot. Prep the skin with a warm shower or damp towel, and finish with a cool rinse and a light moisturizer. If bumps still form, hold off on tight fades over irritated areas until the skin calms, and check that your blade isn't dull or clogged with hair and product buildup.
Should I use clipper oil before or after a haircut?
Oil before and after. A few drops on the blade before you start keeps the cutter moving smoothly and reduces pulling, which is a common cause of irritation. After the cut, brush out hair and debris, disinfect the blade, then oil again to prevent rust and keep the blade cool for the next client. Andis Clipper Oil 4 oz. at $4.99 is formulated for all clipper and trimmer blades and works as a regular maintenance step.
Can rubbing alcohol help after shaving with clippers?
Rubbing alcohol can disinfect a blade, but it is harsh on irritated skin and can dry out the area, which makes redness and flaking worse. For skin that's already angry, rinse with cool water and apply a fragrance-free moisturizer or a hydrocortisone cream if a barber or doctor recommends it. Save the alcohol for tool sanitation, and use a dedicated clipper disinfectant spray on the blade instead of wiping down the client's skin.
When should I see a doctor about bumps or a rash after a haircut?
See a doctor if bumps spread, fill with pus, feel hot, or come with fever, or if irritation lasts more than a week or two despite better technique and clean tools. Barber's itch and folliculitis are infections, not simple razor burn, and they need medical treatment. Also get checked if you notice patchy hair loss or spreading redness, since those signs point to something beyond routine clipper irritation.
