

Table of Contents
- Why an Organized Barber Station Matters
- Step 1: Set Up the Three-Zone Workflow System
- Step 2: Choose the Best Barber Tool Organizers
- Step 3: Follow Barber Station Sanitation Requirements
- Step 4: Apply Ergonomic Barber Station Setup Principles
- Step 5: Manage Cords, Drawers, and Daily Maintenance
- Common Organization Mistakes and How to Avoid Them
- Conclusion: Build a Station That Works for You
- Frequently Asked Questions
Last Updated: September 4, 2026
A cluttered workstation does more than look unprofessional, it directly slows your cutting speed and forces you to break eye contact with the client mid-fade. Organizing a barber station efficiently is the difference between a smooth, profitable day and one spent hunting for a missing guard. At Fade Supply Co, we've built our reputation on professional-grade tools, but we also know that how you arrange those tools determines your workflow efficiency. Below, we'll walk you through a practical, zone-based system that eliminates clutter and keeps every essential within arm's reach, so you can focus entirely on the cut.

Why an Organized Barber Station Matters
An efficient barber station is a system where every tool has a designated home and can be retrieved without looking. This approach minimizes wasted motion, reduces the risk of cross-contamination, and projects a level of hygiene standards that clients notice and remember. When you consistently place clippers, shears, and combs in the same spot, your muscle memory takes over, allowing you to maintain a fluid rhythm from start to finish.
The cost of disorganization is real. Losing a blade or fumbling for a comb adds seconds to every service, which compounds across a busy day. That lost time translates directly into lost revenue. Beyond speed, a tidy station signals professional excellence, which supports client retention and justifies premium pricing for your services.
Step 1: Set Up the Three-Zone Workflow System
The most effective way to organize a barber station is to divide your counter space into three distinct zones: the prep zone, the service zone, and the cleanup zone. This layout mirrors the natural flow of a haircut, ensuring you never cross-contaminate clean tools with used ones.
Your prep zone should hold sanitized tools ready for the next client, such as clean combs, fresh blades, and folded towels. The service zone is your primary working area, where your clippers, trimmers, and shears live within immediate reach. Finally, the cleanup zone, typically positioned near your disinfectant, is where used tools are placed immediately after service to prevent mixing with clean inventory.
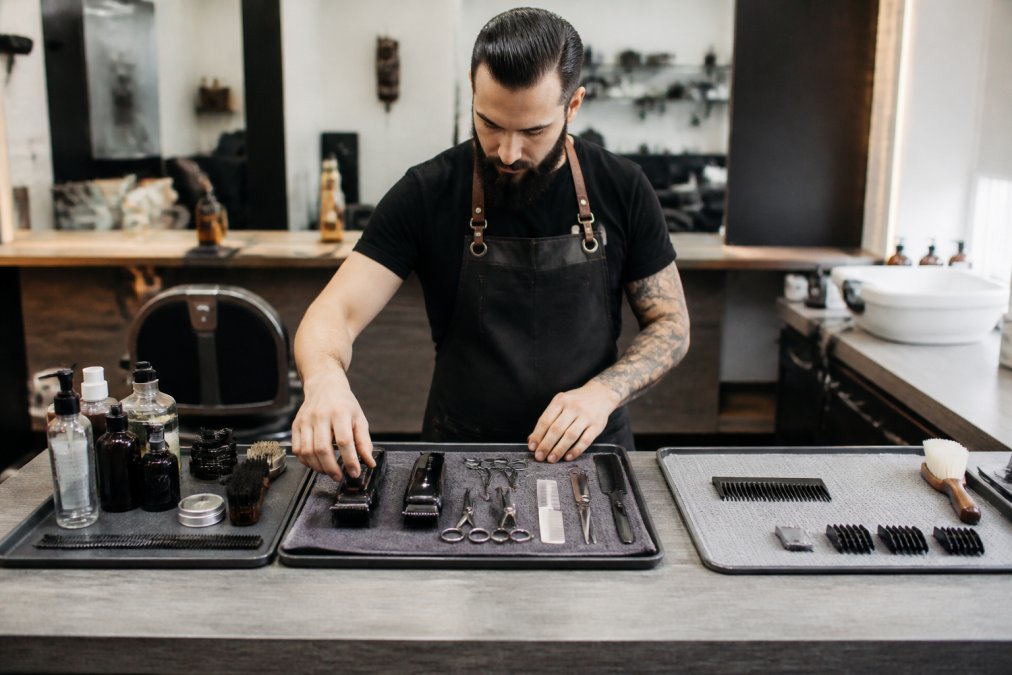
This system works because it creates a one-way traffic pattern for your tools. A comb moves from the prep zone, to the service zone, and then to the cleanup zone. It never moves backward, which is the foundation of a sanitary workflow.
Step 2: Choose the Best Barber Tool Organizers
While physical organizers are the backbone of any station, the modern barber station is no longer just a countertop; it's a command center. The biggest organizational challenge most barbers face today isn't where to put the clippers, it's where to put the tablet, the phone, and the charging cables that now run a business.
Designate a Tech Zone. Instead of letting your phone and tablet fight for space with your shears, create a dedicated tech zone at the rear corner of your station, opposite your dominant hand. This keeps booking apps, music controls, and payment systems accessible without contaminating your sterile service zone. Use a small, non-slip stand to elevate the tablet to a 15-20 degree angle, which reduces glare and allows you to glance at client notes without breaking eye contact for more than a second.
Manage the Charging Cable Problem. The most common tech-related clutter is the tangle of charging cables. A single braided, 6-foot cable with a multi-port USB hub mounted under the station's lip is a solution. This keeps the cable out of your work area but within reach. For wireless earbuds, a small magnetic charging puck adhered to the side of your station prevents them from being knocked into a drawer or lost in a towel.
Physical Organizers with a Tech Twist. When selecting physical organizers, look for models that don't block a line of sight to your screen. A low-profile magnetic mat is superior to a tall caddy for the service zone, as it holds tools flat and out of the tablet's viewing angle. For guards, a wall-mounted rack or a holder that sits behind the tablet keeps them visible but out of the primary tech zone.

The Trade-Off: Analog vs. Digital. There is a real trade-off between keeping your tools analog and going fully digital. While a tablet can hold your service menu and booking schedule, it cannot replace the tactile feel of a well-placed comb. The most efficient stations treat tech as a supplementary layer, not the core. The physical tools remain in the three-zone flow, and the tech is an adjacent support system. This prevents the station from becoming a cluttered desk with clippers on it, rather than a barber station with a screen on it.
Step 3: Follow Barber Station Sanitation Requirements
Barber station sanitation requirements are not optional suggestions; they are mandatory protocols for preventing the spread of bacteria and viruses between clients. Every tool that touches a client's skin or hair must be cleaned and disinfected before it is used on the next person. This includes clippers, trimmers, shears, and combs.
A proper sanitation workflow involves three steps: removing hair and debris, washing with soap and water, and then immersing tools in an EPA-registered disinfectant like Barbicide (the EPA). The Fade Supply Acrylic Disinfecting Jar, 37 oz provides a dedicated station for this task. Its removable basket allows you to lift tools out without touching the disinfectant, and its clear acrylic construction lets you see when the solution needs changing. State licensing boards routinely inspect stations for compliance, and a visible, organized disinfecting station demonstrates that you take hygiene standards seriously (osha.gov).
Step 4: Apply Ergonomic Barber Station Setup Principles
Ergonomic barber station setup is about positioning your tools to minimize strain on your wrists, shoulders, and back during long hours behind the chair. The goal is to keep frequently used items within a comfortable arm's reach, so you never have to twist your torso or overextend your shoulder to grab a tool. However, true ergonomics extend beyond muscle fatigue, they include how your station's layout interacts with your lighting to reduce eye strain and shadows during precision work.
The Lighting Angle Problem. Most barbershops rely on overhead lighting, which casts shadows directly downward. If your station is cluttered with tall bottles, caddies, or a bulky tool stand, you are creating unintended shadow zones on your client's head. A shadow across the temple or neckline can cause you to miss a line or misjudge a fade, forcing you to lean in awkwardly and strain your neck. The most efficient stations are not just low-profile for space; they are low-profile for light.
The 10-Inch Rule. To minimize shadows, keep all items on your station under 10 inches in height (the CDC). This includes your disinfectant jar, your guard holder, and your phone stand. Anything taller than this will cast a shadow that moves across your work area as you change position. If you must have a taller item, place it at the far rear corner, directly under the light source, so the shadow falls behind your hands rather than on the client.

Mirroring for Light and Reach. For left-handed barbers, the layout should be mirrored entirely; many standard stations are right-hand biased, which forces lefties into awkward wrist angles. But mirroring also affects lighting. If your station's primary light source is on the right, a right-handed barber's hand will cast a shadow to the left. A left-handed barber working in the same spot will cast a shadow to the right, directly onto the cutting zone. If you are left-handed, position your station so the light source is on your right side, casting the shadow away from your shears. This simple adjustment reduces eye fatigue and improves cutting accuracy.
Adjusting Your Stance, Not Just Your Tools. Ergonomics also means adjusting your stance relative to the station. Your service zone should be a smooth arc from your elbow, not a straight line that requires leaning. If you find yourself hunching to see around a bottle or a tablet, that is an ergonomic failure caused by poor organization. The station should be arranged so your spine stays neutral, your elbows stay close to your torso, and your eyes are level with the client's head. This reduces fatigue and helps you maintain cutting speed through the last client of the day.
Step 5: Manage Cords, Drawers, and Daily Maintenance
Cord and cable management is the most overlooked detail in station organization. A dangling cord can pull your clippers off the counter or snag on a client's cape, interrupting your flow. Use cable wraps or clips to secure cords along the back edge of the station, keeping them out of your working zone but still allowing full range of motion.
Inside your drawers, use dividers to separate clean inventory from tools awaiting maintenance. Store extra blades, guards, and combs in labeled sections so you can restock your prep zone without a scavenger hunt. A daily maintenance routine should take no more than five minutes at the end of your shift: wipe down the mat, brush hair from drawers, and return any misplaced tools to their zones. This small investment prevents clutter from accumulating overnight.
Common Organization Mistakes and How to Avoid Them
The most frequent mistake barbers make is trying to keep every tool they own on the counter. This approach creates visual chaos and forces you to work around items you use once a week. A better strategy is to keep only the tools for your current service on the surface and store the rest in a drawer.
Another error is neglecting the cleanup zone. If you do not have a dedicated spot for used tools, they end up mixed with clean ones, which is a sanitation violation and slows down your turnover between clients. Finally, many barbers fail to adjust their setup as their service menu changes. If you add more skin fades to your offerings, your station should reflect that by prioritizing those specific guards and trimmers in the service zone.
Conclusion: Build a Station That Works for You
An organized station is not a luxury; it is a competitive advantage that protects your tools, your time, and your clients. Start by clearing your counter and mapping out the three zones, then invest in organizers that keep your essentials visible and within reach. Fade Supply Co offers a range of station organization tools, from guard vaults to magnetic mats, designed to support a disciplined workflow. Shop the collection and build a station that lets your craft speak for itself.
Frequently Asked Questions
What are the essential tools every barber station needs?
Every barber station needs clippers, trimmers, shears, razors, combs, brushes, and disinfectant within arm's reach. A magnetic station mat or organizer keeps these tools visible and prevents clutter. You also need a disinfecting jar for tools between clients and a designated spot for cord management. The goal is to access any tool without breaking eye contact or turning away from the chair.
How do you arrange clippers for maximum efficiency?
Arrange clippers based on how often you use them. Your primary clipper and trimmer stay in the service zone, positioned in your dominant hand's natural reach. Backup blades and guards go in a separate organizer nearby. This setup applies to both right-handed and left-handed barbers, so position the tools on the side that lets you grab them without looking down.
What is the best way to sanitize tools at your station?
Follow barber station sanitation requirements by keeping an EPA-registered disinfectant and an acrylic disinfecting jar with a removable basket at your station. Submerge combs, shears, and guards after each client, and wipe down clippers with a brush and disinfectant spray. Replace the solution according to the label instructions, usually daily, to maintain hygiene standards.
How does station layout impact service time?
A smart station layout cuts service time by eliminating wasted motion. When tools live in a consistent spot, you reach for them automatically instead of searching. The three-zone system, with prep, service, and cleanup areas, keeps your workflow moving from start to finish. This workflow efficiency adds up to more cuts completed per day without rushing.
This article was written using GrandRanker