

Last Updated: October 26, 2026
Quick Summary
To choose barber shears for beginners in 2026, measure your middle finger and palm width first, then match blade length to your cutting technique. Set a budget before browsing, check the edge grind and pivot tension, and plan a maintenance routine from day one.
- Measure from the base of your middle finger to its tip and across your palm at the widest point.
- A middle finger of 3 to 3.5 inches with an average palm starts at 5.5 to 6.0 inch shears.
- Entry-level shears typically cost $40 to $90, while student and early career shears run $90 to $200.
- Spend on steel, the pivot, and fit; save on finishes and accessories.
- Wipe blades after every cut and apply one drop of shear oil to the pivot weekly.
Table of Contents
- How to Choose Barber Shears: A 7-Step Buying Workflow for 2026
- What You'll Need Before You Shop
- Step 1: Measure Your Hand to Find the Right Barber Shear Sizes
- Step 2: Match Shear Length to Your Cutting Technique
- Step 3: Understand Convex vs Beveled Edge Shears
- Step 4: Test Fit and Tension Before You Buy
- Step 5: Set a Beginner Budget and Pick the Best Barber Shears for Beginners
- Step 6: Plan for Barber Shear Maintenance and Sharpening
- Step 7: Avoid Common First-Purchase Mistakes and Stay Safe
- Your Next Step
- Frequently Asked Questions
How to Choose Barber Shears: A 7-Step Buying Workflow for 2026
Buying your first pair of barber shears is the most important tool decision you will make in your early career. Below, we show you exactly how to choose barber shears for beginners in 2026, from hand measurement to maintenance.
Barber shears are precision cutting tools made from hardened stainless steel, sized by blade length and built to slice hair cleanly rather than crush it. Get the size and edge wrong and every haircut fights you.
What You'll Need Before You Shop
Gather three things before you open a single product page.
- A flexible tape measure or a small ruler
- A notebook to record your measurements
- Your cutting technique: scissor-over-comb, clipper-over-comb, or both
Write down your measurements once and keep them. You will use them every time you shop for shears, and you will use them again when you upgrade.
Step 1: Measure Your Hand to Find the Right Barber Shear Sizes
Barber shear sizes are not about your height or experience level. They are about your hand. The right shear size lets your fingers open and close the blades fully without stretching or cramping.
How to Measure Finger Length and Palm Width
Measure from the base of your middle finger to its tip. Then measure across your palm at the widest point. Record both in inches.
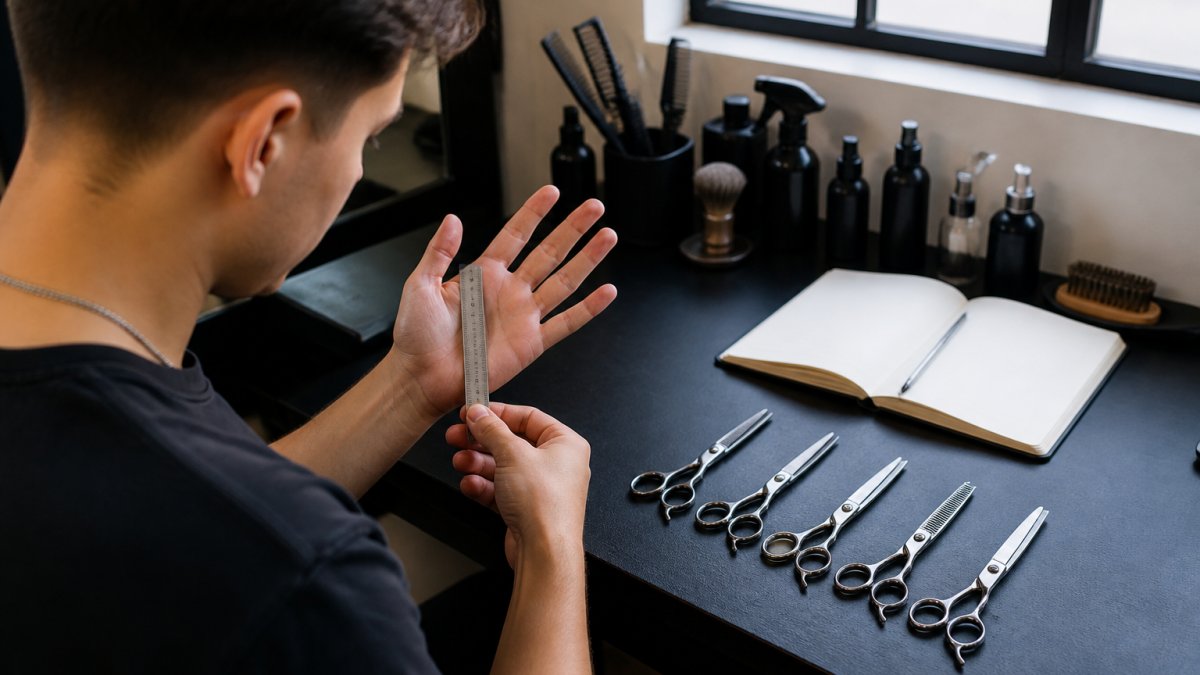
Use this as a starting guide:
| Middle Finger Length | Palm Width | Starting Shear Size |
|---|---|---|
| Under 3 inches | Narrow | 5.0 to 5.5 inches |
| 3 to 3.5 inches | Average | 5.5 to 6.0 inches |
| Over 3.5 inches | Wide | 6.0 to 7.0 inches |
Step 2: Match Shear Length to Your Cutting Technique
Short shears give you control. Long shears give you speed. Your technique decides which one you need first.
Short Shears for Precision Work
If fades are your focus, our guide to barber shears for fades breaks down which blade lengths work best.
Percu Pro Barber Cut Line Shears →
Long Shears for Larger Sections and Efficient Cutting
If you already know your technique, browse the Percu Pro Barber Cut Line Shears, which come in sizes from 5.5 to 8 inches.

Step 3: Understand Convex vs Beveled Edge Shears
Watch out: never cut anything but hair with your shears. One trim of a beard on a paper towel or a stray thread dulls a convex edge faster than a month of haircuts.
Step 4: Test Fit and Tension Before You Buy
- Slide your ring finger into the finger hole. It should sit past the first knuckle without pinching.
- Rest your pinky on the finger rest. Your hand should feel relaxed, not spread.
- Open and close the blades. They should move smoothly with no grinding or wobble.
- Check the pivot screw. A flat adjustable tension screw lets you fine-tune the feel later.
Step 5: Set a Beginner Budget and Pick the Best Barber Shears for Beginners
Set your budget before you browse. A price cap stops you from overspending on features you cannot use yet, and it forces you to compare shears on the things that actually affect cutting: steel, edge grind, pivot, and fit.
Beginner Budget Tiers
| Tier | Typical Price Range (USD) | What You Get | What You Give Up |
|---|---|---|---|
| Entry | $40 to $90 | Japanese or German-style stainless steel, beveled edge, basic adjustable tension screw, limited size options | Softer steel that dulls faster, fewer size choices, plainer finishes, shorter warranty |
| Student / Early Career | $90 to $200 | Hardened stainless steel (often 440C or VG-10 class), convex or beveled edge, reliable pivot, multiple sizes, finger rest options | Premium finishes, custom handles, lifetime sharpening programs |
| Pro-Ready | $200 to $400+ | High-carbon or cobalt-alloy steel, hand-finished convex edge, precise tension adjustment, ergonomic offset handles, longer edge retention | You pay for steel and finishing you may not fully use until your technique stabilizes |
Where to Spend and Where to Save
- Spend on steel. Harder steel holds an edge longer, which means fewer sharpening cycles and less pulling on client hair. This is the single biggest driver of long-term value.
- Spend on the pivot. A smooth, adjustable pivot is what lets you tune tension as your hand strength and technique change. A gritty pivot cannot be fixed later.
- Spend on fit. A shear that fits your hand will be used; a bargain that cramps your hand will sit in a drawer.
- Save on finishes. Mirror polish, colored coatings, and engraved handles add cost without changing the cut.
- Save on accessories. Cases, oil, and cleaning cloths are cheap to buy separately and should not drive the shear price.
- Skip thinning shears for now. Beginners often buy thinning shears too early and use them to fix mistakes that a straight shear would have avoided. Add them once your straight-shear control is solid.
Our pick for a first pair is the Percu Sky Line Shears, designed for sliding cuts and featuring an adjustable screw and a finger rest. If you want to compare more options first, read our roundup of the best professional barber shears for 2026.

Step 6: Plan for Barber Shear Maintenance and Sharpening
Barber shear maintenance and sharpening is not optional. Dull shears pull hair, pulled hair loses clients, and a pulled cut takes longer to finish. The good news is that a simple routine protects your investment for years.
A Maintenance Schedule You Can Actually Follow
| Frequency | Task | Why It Matters |
|---|---|---|
| After every cut | Wipe blades with a soft cloth to clear hair and product | Hair trapped in the pivot grinds the blades and accelerates wear |
| Daily | Brush out the pivot area and check for hair packed between blades | Packed hair throws off tension and causes pulling |
| Weekly | Apply one drop of shear oil to the pivot and work the blades open and closed | Lubrication keeps the pivot smooth and prevents corrosion |
| Monthly | Check tension and adjust the screw if the blades feel loose or stiff | Tension drifts with use; a loose pivot nicks edges |
| As needed | Send for professional sharpening when shears bend or pull hair instead of cutting | A dull edge crushes the cut end, which shows up as split or frayed ends |
When to Sharpen and What to Expect
- The shear bends hair instead of cutting it cleanly
- You feel yourself squeezing harder to finish a section
- Clients flinch or complain about pulling
- The edge reflects light unevenly or shows nicks under close inspection
Storage and Handling Habits
- Store shears in a hard case, never loose in a drawer where edges can knock together
- Keep the protective tip guard on when shears are not in use
- Never cut anything but hair: paper, tape, thread, and beard trims on a towel all dull an edge fast
- Keep shears away from clipper oil and disinfectant sprays that can corrode the pivot
- Dry shears fully after disinfecting; moisture left in the pivot is a common cause of stiffness
Our guide on how to keep clippers sharp covers the same upkeep habits that protect your shears.
Step 7: Avoid Common First-Purchase Mistakes and Stay Safe
- Do not buy shears without measuring your hand first
- Do not buy the longest blade because it looks professional
- Do not buy used shears with unknown sharpening history
- Do not skip the tension check on delivery
- Do not cut anything but hair with your shears
Your Next Step
Fade Supply Co provides professional-grade barber tools and station essentials. Founded by a veteran and informed by real-world experience behind the chair, the company serves students and working barbers. Browse the collection and start with a pair of shears.
Frequently Asked Questions
What size barber shears should a beginner choose?
Most beginners should start with a 5.5-inch or 6-inch barber shear. Measure your middle finger and palm first: if your middle finger is under 3 inches, a 5.5-inch shear gives you better control for precision cutting, scissor-over-comb, and point cutting. A 6-inch shear suits average to larger hands and handles blunt cutting and slide cutting on longer sections. Only move to 7-inch or 8-inch shears once your hand size and cutting technique support the extra reach.
What is the difference between convex and beveled-edge barber shears?
Convex edge shears have a curved, hollow-ground blade that slices through hair with less push, which makes them popular for slide cutting and soft blending. Beveled edge shears have a flat, angled edge that is more durable and easier to sharpen, so they hold up well for blunt cutting and point cutting in high-volume shops. Beginners often prefer beveled edges for durability, then add a convex pair for finishing work.
How much should a beginner spend on barber shears?
At Fade Supply Co, the [Percu Pro Barber Cut Line Shears](https://fadesupplyco.com/products/percu-pro-barber-cut-line-shears) are $49.99, while the [Percu Ziggy Line Hair Shear 6-inch](https://fadesupplyco.com/products/percu-ziggy-line-hair-shear-6) and the [Percu Barber Slim Cut Line Hair Shear](https://fadesupplyco.com/products/percu-barber-slim-cut-line-hair-shear-assorted-sizes) are $79.99.
How often should barber shears be sharpened?
Sharpen barber shears every 6 to 12 months depending on how many cuts you do per week. High-volume barbers who cut 20 or more clients weekly may need sharpening closer to every 6 months, while students and part-time barbers can stretch to 12 months. Watch for pulling, folding hair, or a blade that no longer slices cleanly, and keep the pivot screw adjusted and the blades oiled between sharpenings to protect edge life.
