

Table of Contents
- The Most Common Skin Fade Mistakes Barbers Make
- How to Fix a Harsh Line in a Fade
- Pressure Control and Blade Alignment Issues
- Addressing Patchiness and Uneven Blending
- Best Barber Clippers for Skin Fades
- Fading Techniques for Beginners
- Tool Maintenance to Prevent Fade Mistakes
- Conclusion
- Frequently Asked Questions
Last Updated: August 31, 2026
The Most Common Skin Fade Mistakes Barbers Make
A skin fade is a haircut that tapers hair from longer on top to bare skin at the sides and back, creating a seamless gradient. It's one of the most popular cuts in modern barbering, but also where most barbers struggle. The difference between a flawless fade and one that looks patchy, uneven, or harsh comes down to technique, tool maintenance, and understanding your mistakes.
The most common skin fade mistakes fall into predictable categories: pressure control, blade alignment, improper guard progression, and failing to account for hair density and head shape. The good news is that most mistakes are entirely preventable once you understand what's causing them. Below, we'll walk through the most frequent errors, show you how to fix them, and give you diagnostic tools to catch mistakes before they ruin a cut.
How to Fix a Harsh Line in a Fade
A harsh line is an abrupt, visible transition between two guard lengths instead of a smooth blend. It's usually the result of skipping a guard size, using the wrong technique, or failing to feather properly between lengths.
If you can see a clear demarcation line midway through your fade, you likely jumped from one guard length to another without proper blending. Introduce an intermediate guard size between the two lengths you used. If you went from a 0.5 guard directly to a 1.5 guard, use a 1 guard in between. Make several passes with the intermediate guard, slightly overlapping the areas where each guard was used, to create a gradient instead of a step.
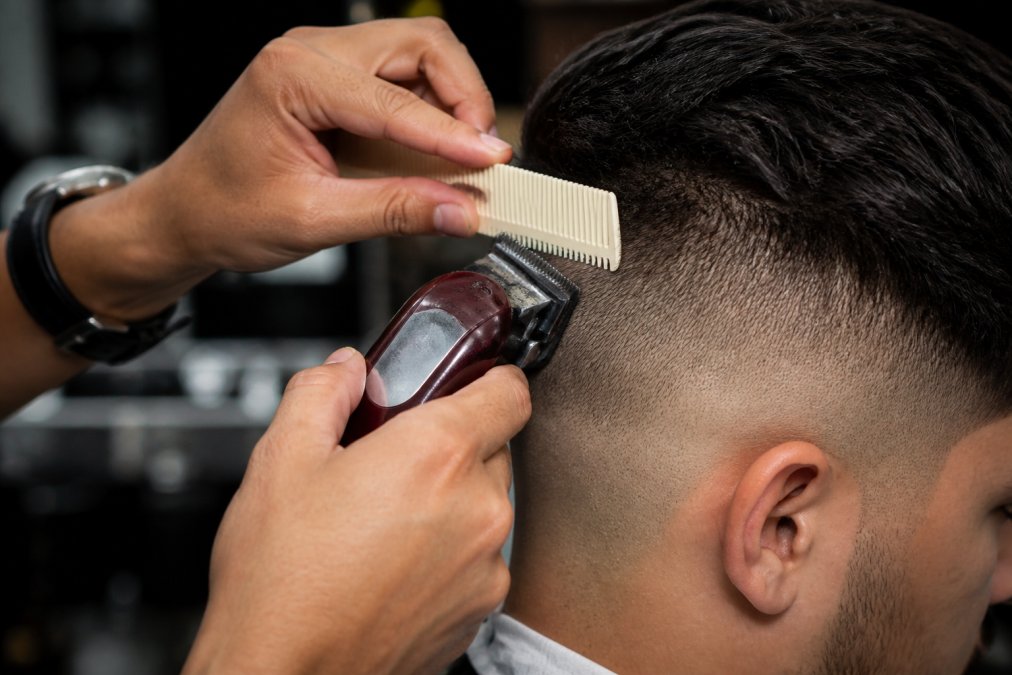
The second common cause is improper clipper-over-comb work. When using the comb as a guide, it needs to be at the right angle and the clipper blade must be aligned perpendicular to the comb's teeth. If the blade is tilted, you'll cut at different lengths along the same pass, creating an uneven line. Check your blade alignment by holding the comb flat against the head and ensuring the clipper sits flush against it.
Use a flicking motion at the transition zone, a quick upward flick of the clipper as you reach the boundary between guard lengths. This creates a subtle gradient rather than a hard edge. The flick needs to be smooth and consistent, not jerky. Practice this motion on a mannequin until it becomes automatic.
Pressure Control and Blade Alignment Issues
Pressure control is the most underrated technical skill in barbering. Many barbers apply too much downward force on the clippers, which causes the blade to heat up faster, hair to be pulled instead of cut cleanly, and loss of precision in your lines.
Let the clipper do the work. The blade is moving at high speed; you don't need to push it into the scalp. Light, consistent pressure is all that's required. A good test is to hold the clipper against your own arm. You should feel the blade working, but it shouldn't feel aggressive or uncomfortable.
Blade alignment is equally critical and often overlooked. Over time, through normal use and minor impacts, blade alignment can shift. A misaligned blade cuts unevenly, causing inconsistent cutting depth across a single pass.
Check your blade alignment by looking at the blade head straight on. The two blades should be perfectly parallel (peer-reviewed research). If one blade appears slightly higher or lower than the other, the clipper needs adjustment. Most professional-grade clippers have adjustment screws that allow you to fine-tune blade alignment. Consult your clipper's manual for the specific process.
The relationship between pressure and blade alignment is direct: a misaligned blade combined with heavy pressure will produce visible lines, patchiness, and uneven fading. Fix the blade alignment first, then reduce your pressure.
Addressing Patchiness and Uneven Blending
Patchiness appears as random short spots or variations in hair length across the fade. It's usually caused by inconsistent guard usage, uneven pressure during passes, or failing to account for hair density variations across the head.
Hair density isn't uniform. The sides of the head often have denser hair than the back, and the nape area frequently has different texture and growth patterns than the temporal region. A single guard length will look different depending on where you use it because the underlying hair density is different. In high-density areas, you may need to make additional passes with the same guard to ensure full coverage. In lower-density areas, fewer passes might be sufficient.
Uneven blending also happens when you're not making overlapping passes. Each pass with a clipper should overlap the previous pass by about 25-30% (peer-reviewed research). This ensures complete coverage and creates a smooth gradient.
The diagnostic test for patchiness is simple: run your hand against the grain of the fade. You should feel a smooth gradient from longer to shorter. If you feel spots that are noticeably shorter or longer than their surroundings, make additional passes in those specific areas using the appropriate guard and maintaining consistent pressure.
| Problem | Cause | Solution |
|---|---|---|
| Random short spots | Inconsistent passes or pressure | Make overlapping passes; check pressure consistency |
| Visible density variations | Not accounting for hair density differences | Adjust pass count based on density; use clipper-over-comb in dense areas |
| Uneven gradient | Skipped guard lengths or poor blending | Use intermediate guards; feather transitions |
| Rough texture | Blade misalignment or pulling hair | Check blade alignment; reduce pressure |
Best Barber Clippers for Skin Fades
The right clippers make a significant difference in your ability to execute clean skin fades. Professional-grade clippers designed specifically for fade work offer better blade stability, more consistent cutting, and longer durability than consumer-grade alternatives.
When selecting clippers for skin fades, prioritize blade sharpness, heat management, and ergonomic design. Dull blades pull hair instead of cutting it cleanly, making precise fading nearly impossible. Quality clippers maintain blade sharpness longer and are easier to maintain.
Heat buildup is a real problem in high-volume shops. Clippers that dissipate heat effectively allow you to work longer without the blade becoming too hot. An overheated blade loses cutting efficiency and can cause discomfort to the client. Look for clippers with ventilation design and use clipper oil to reduce friction and heat during extended use.
Ergonomic design matters more than most barbers realize. Clippers you hold for 6-8 hours daily should fit comfortably in your hand and not cause strain or fatigue. Weight distribution, grip texture, and overall balance all contribute to how the clipper feels during extended use. A poorly balanced clipper causes hand fatigue and leads to inconsistent pressure, which directly impacts fade quality.
For professional barbers and shop owners stocking equipment, Fade Supply Co offers curated selections of professional-grade clippers tested in real working conditions, focusing on tools that deliver consistent performance in high-volume environments without requiring constant maintenance or blade replacement.
Fading Techniques for Beginners
The foundational technique for skin fades is the flicking motion combined with proper guard progression. Start with a 0 or 0.5 guard at the very bottom, then move up to a 1 guard, then a 1.5, then a 2, working upward toward the longer hair on top. Each guard should be used in a slightly higher area than the previous one, with overlap to create the gradient.
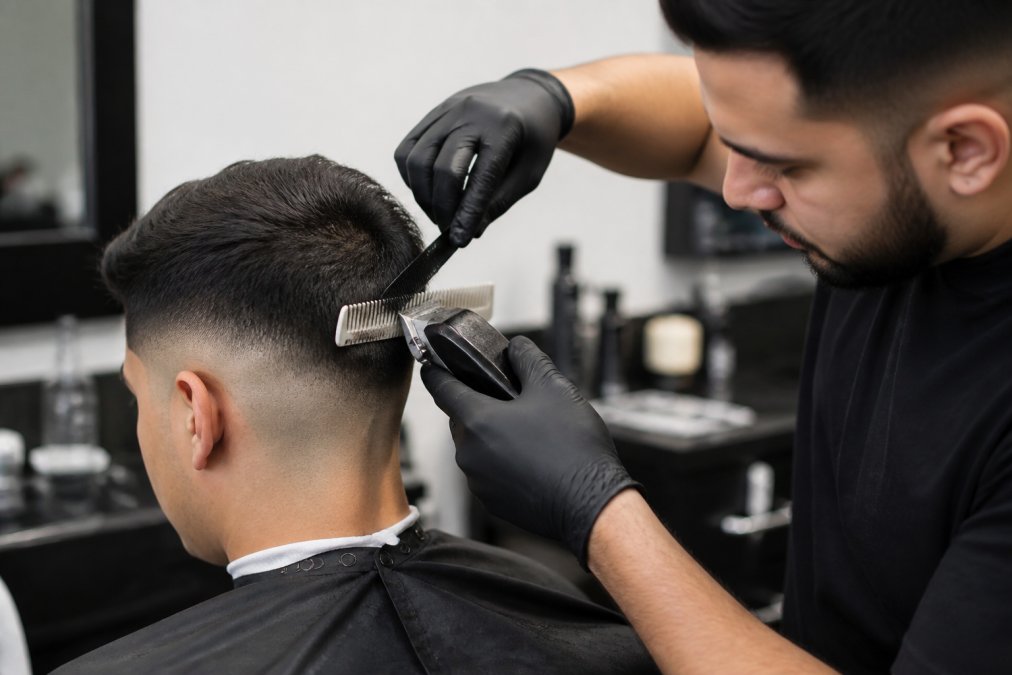
The flicking motion is key to smooth transitions: as you reach the boundary between guard lengths, flick the clipper upward slightly. This creates a subtle feathering effect that blends the two lengths together instead of creating a hard line. Practice this motion on a mannequin until it becomes automatic.
Another beginner technique is clipper-over-comb work. This is slower than using guards alone, but it gives you more control and teaches you how different blade angles and comb positions affect the final result. Hold the comb flat against the head with your non-dominant hand, then run the clipper over the comb's teeth. The comb acts as a guard, determining cutting length based on how far the teeth protrude from the scalp.
Clipper-over-comb work teaches you to understand blade angle and pressure control because you have direct feedback. Use this technique for at least 20-30% of your fade work while you're learning. As you improve, you can shift more toward guard-based work, which is faster.
Don't try to rush the process. A proper fade takes time. Allocate 20-25 minutes per fade while you're developing technique. As your muscle memory improves, you'll naturally speed up without sacrificing quality.
Tool Maintenance to Prevent Fade Mistakes
Blade maintenance is the most neglected aspect of fade work and directly responsible for many mistakes. A dull blade will cause pulling, inconsistent cutting, and difficulty achieving clean lines. Regular maintenance prevents most blade-related problems.
Clean your clipper blades after every client. Hair, skin cells, and product buildup accumulate on the blade and affect cutting performance. Use a small brush to remove loose hair from the blade teeth. For deeper cleaning, use a clipper cleaning solution or blade wash. Soak the blade for 5-10 minutes if buildup is heavy, then brush it clean and dry thoroughly.
Oil your blades regularly. Clipper oil reduces friction, which decreases heat buildup and extends blade life. Apply a small amount of oil to the blade after cleaning, then run the clipper briefly to distribute the oil evenly. Don't over-oil; a light coating is sufficient.
Check blade sharpness weekly if you're doing high-volume fade work. A simple test is to run the blade lightly across your arm hair. A sharp blade should cut cleanly without pulling (peer-reviewed research). If you feel resistance or hair is being pulled instead of cut, the blade needs sharpening or replacement. Most professional barbers send blades out for professional sharpening every 4-8 weeks depending on volume.
Alignment checks should be part of your monthly maintenance routine. A quick visual inspection of blade alignment takes 30 seconds and prevents hours of frustration later. If alignment has shifted, make the necessary adjustments before it starts affecting your work.
Store your clippers properly. Keep them in a cool, dry place away from moisture and extreme temperatures. A dedicated clipper storage case or drawer with a desiccant pack is ideal for protecting your investment.
The Percu Fade Comb #PC-046 is an essential maintenance tool for fade work. Its precisely spaced teeth provide consistent guide length for clipper-over-comb work, and its flexibility allows for proper contouring to head shape. Pairing quality maintenance tools with a consistent maintenance routine ensures your equipment performs reliably.

For barbers managing multiple stations or shops with several staff members, Fade Supply Co's 8-Piece Hair Gripper Set keeps your station organized and makes sectioning during fades more efficient. Proper sectioning reduces the chance of missing areas or creating uneven transitions, which directly impacts fade consistency.

Conclusion
Troubleshooting skin fade mistakes comes down to understanding the relationship between pressure, blade alignment, guard progression, and hair density. Most mistakes are preventable with proper technique and equipment maintenance. The investment in quality tools and the discipline to maintain them consistently will eliminate the majority of fade problems you encounter.
Start with Fade Supply Co and build a reliable toolkit designed for professional fade work. Our selection of professional-grade clippers, fade combs, and maintenance tools is chosen based on real-world performance in high-volume barbering environments. Get started with Fade Supply Co and transform your fade consistency.
Frequently Asked Questions
Q: What is the most common mistake people make when fading?
A: The most common skin fade mistake is applying too much pressure with the clippers, which can cause scalp irritation, patchiness, and uneven results. Barbers often press down hard thinking it creates a cleaner cut, but light, controlled pressure with proper blade alignment can deliver better blending and prevent damage to hair follicles. Let the clipper do the work, your hand position and guard selection matter far more than force.
Q: How do you fix a harsh line in a skin fade?
A: A harsh line appears when the transition zone between guard lengths is too abrupt. Fix it by using a fade comb with your clippers to blend the line upward in small, overlapping passes. Start at the harsh line and work your clippers at a 45-degree angle, using the flicking motion to feather the hair gradually. Multiple light passes create a smooth gradient better than one aggressive pass. The [Percu Fade Comb #PC-046](https://fadesupplyco.com/products/percu-fade-comb-pc-046) is designed specifically for this clipper-over-comb work.
Q: What tools are essential for fixing fade mistakes?
A: A quality fade comb, sharp clippers with proper blade alignment, and a fade brush are non-negotiable. The fade comb allows precise clipper-over-comb blending, while a fade brush removes loose hair so you can see your actual lines and progress. Sharp blades prevent pulling and ensure clean cuts through different hair densities. The [Percu Fade Comb #PC-046](https://fadesupplyco.com/products/percu-fade-comb-pc-046) and [Percu Premium Black Fade Brush PRM #PC-FADE PRM](https://fadesupplyco.com/products/percu-premium-black-fade-brush-prm-pc-fade-prm) are professional-grade tools that give you the control needed to correct patchiness and harsh lines.
Q: How can I improve my blending technique for skin fades?
A: Master the flicking motion by keeping your clipper angle consistent and using light, upward strokes that gradually reduce clipper depth. Pay attention to hair growth patterns and head shape, fading against the grain gives a tighter result, while fading with the grain is gentler. Practice zero-gap technique on longer guards before moving to shorter ones. Work in the transition zone between guard lengths with multiple passes rather than trying to achieve the fade in one or two strokes. Consistency comes from repetition and tool control, not pressure.
This article was written using GrandRanker